Sonible smart:EQ 3 Overview
- January 7, 2022
- by Steve Castellano
- Product Intelligence Report
I’m not a professional audio engineer. On those occasions where I’m faced with a screen full of unmixed tracks, there’s always a moment of anxiety spent wondering if and how I’m going to make it all work. And then the mixing begins, with the gradual realization that while it’s not going to be impossible, it will take time, and that with practice and experience, each mix will (hopefully) be better and easier than the last one.
sonible smart:EQ 3 offers a potential solution to my anxiety by using AI-powered algorithms to help me mix my music. To say that EQ is a pretty important component of a mix is a gross understatement, and relinquishing it to artificial intelligence feels at first like giving up a lot of authority over the overall sound. In practice, though, smart:EQ 3 produces results that are effective and largely transparent, and gives you full control of how much AI intervention you want in your mix.
The role of EQ
Primarily, equalization does three things for us. We can use it to repair or mitigate unwanted elements of the recording. We use it to enhance the sound of an instrument or voice. And we use it to keep our overall mix in balance by finding frequencies where tracks may be competing for our ears’ attention – an issue known as masking. That’s some heavy lifting, and it can take time to get right.
smart:EQ 3 uses AI-powered analysis to identify and correct spectral imbalances in our recordings. I learned through a series of test tracks that while the creation of spectral balance in a mix can certainly have a bearing on all three of the tasks listed above, it is primarily concerned with the third. The overall effect of smart:EQ 3 is subtle but powerful. Rather than mixing your music for you, it creates a tidy mise en place for you to work your own magic.
Finding spectral balance
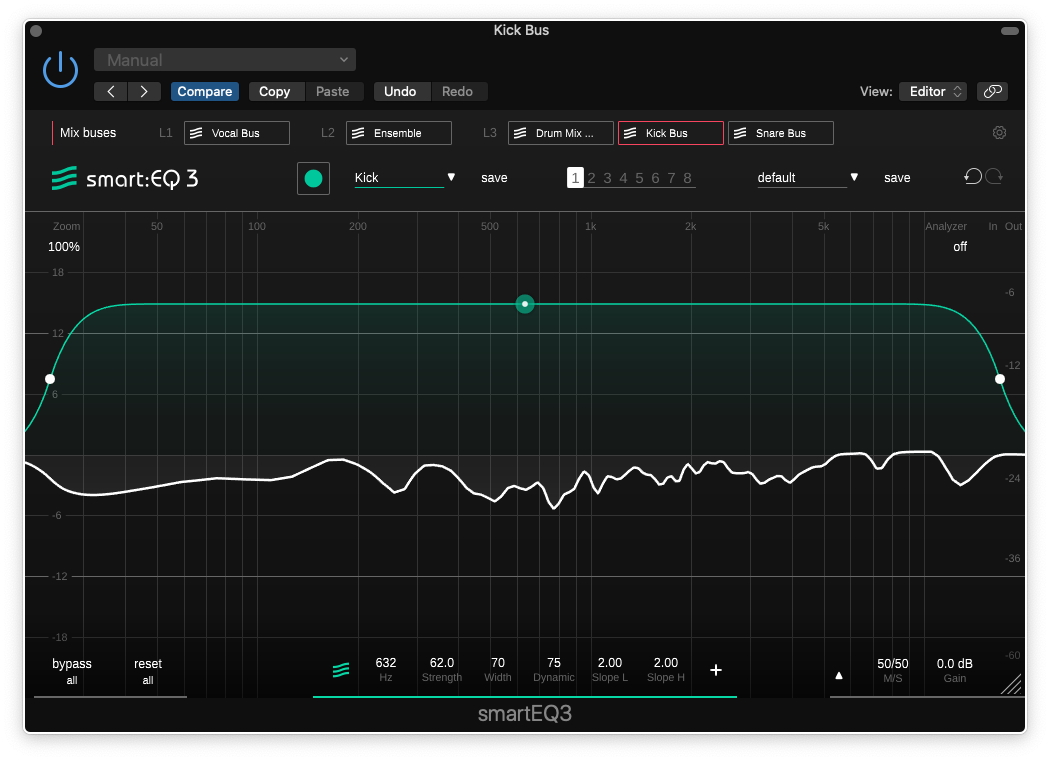
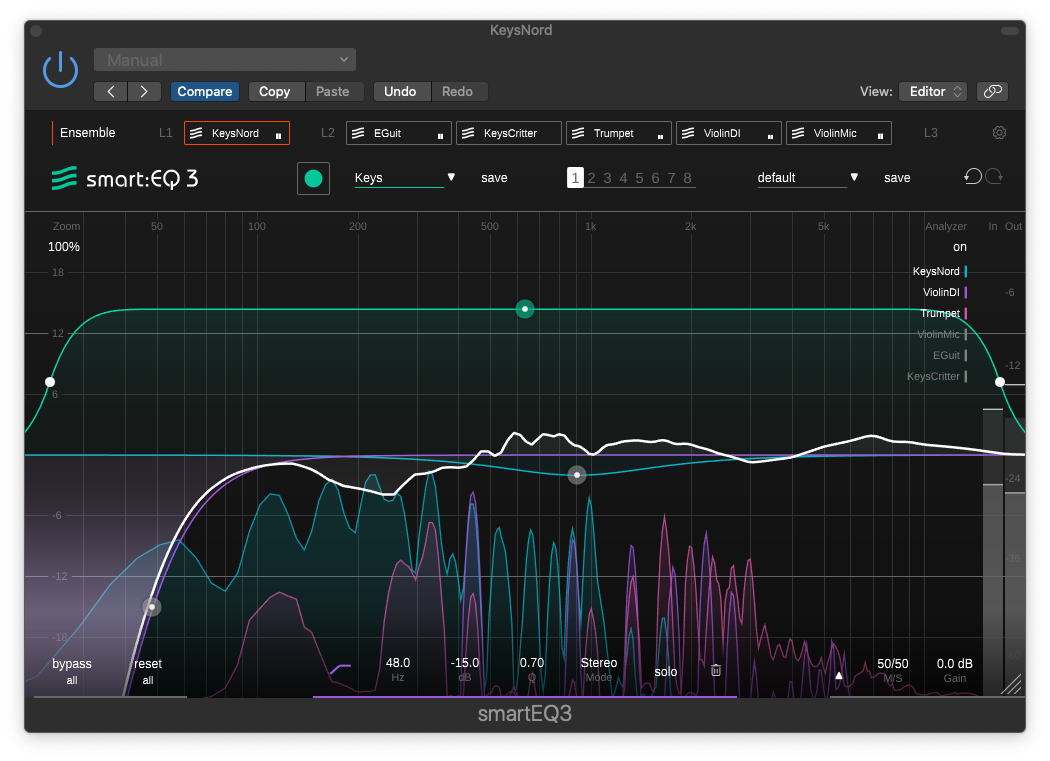
For all the complexity going on behind the scenes, smart:EQ 3 is remarkably simple to get up and running. The manual is a scant 25 pages, though a short video tutorial may be all you need to start. Insert it into a track and you’re presented with an empty time vs frequency plot. Now select a profile for your track from the drop-down menu – the default setting is Universal, which will do if you can’t find a closer match among the factory profiles. Then press the Learn button to the left of the profile menu to analyze the track.
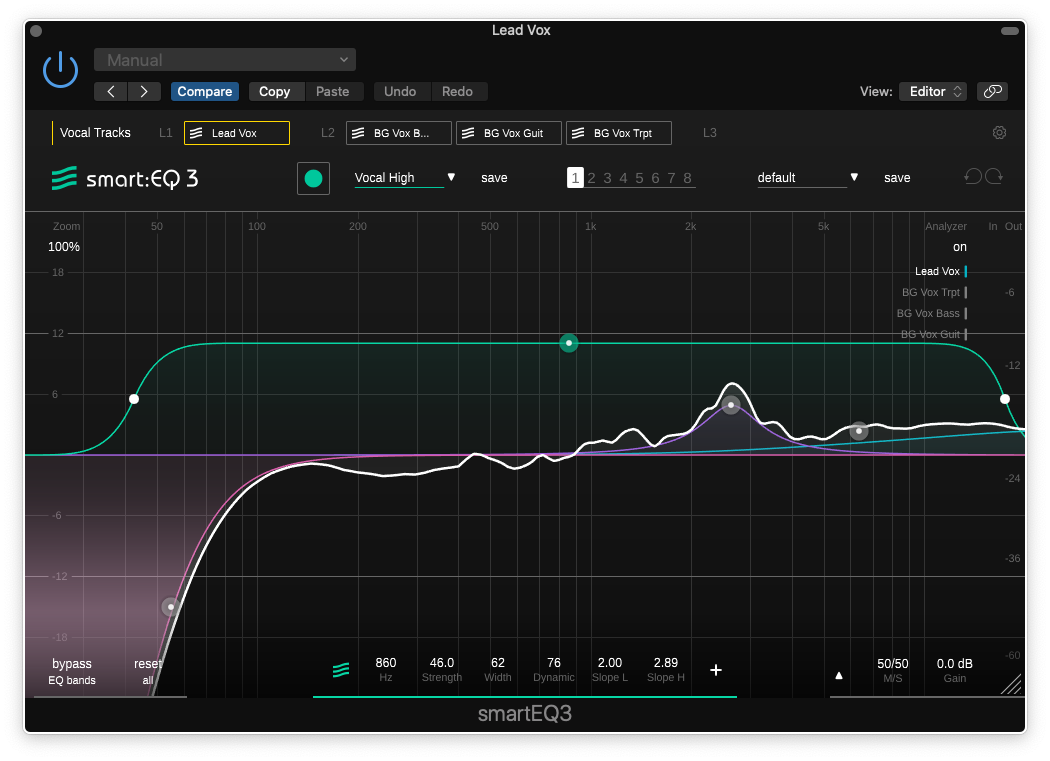
smart:EQ 3 will now listen to your track for a few seconds and suggest an EQ curve. In addition to the EQ curve, a weighting curve, which appears like a bracket over the suggested EQ curve, allows you to adjust how much of an effect you want it to have on your track – in both impact and frequency range. You can also add your own filter curves to modify the suggested curve, and save the result as your own custom profile for use in future mixes.
I noticed a couple of things right away working with smart:EQ 3. The AI EQ recommendations, though subtle, were very detailed. smart:EQ 3 wasn’t taking any of my tracks in drastic new directions, but judging from the number of peaks and valleys in the suggested curve – quite a few more than I would have inserted manually – it was thinking very hard about what it was doing. On the other hand, it was clearly leaving some important decisions up to me (notably, whether to add low cut filtering).
Mixing with smart:EQ 3
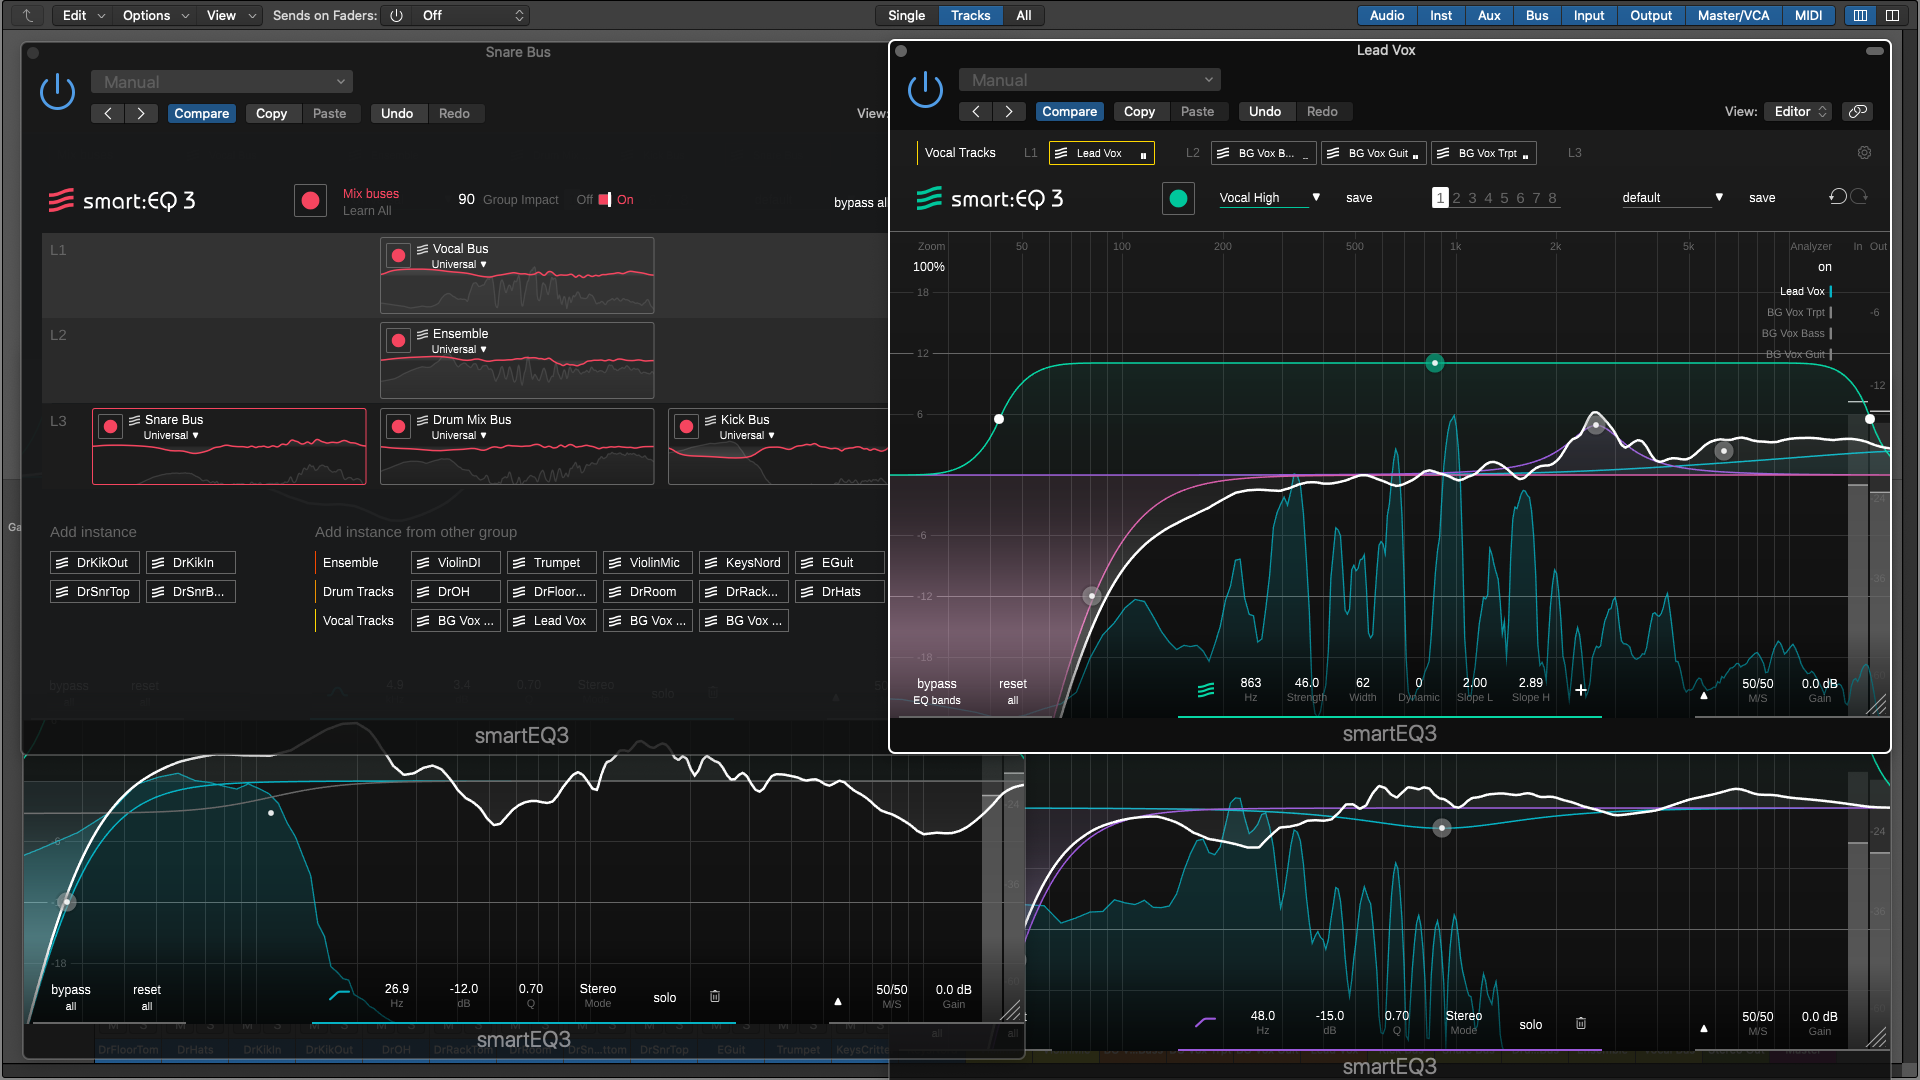
I proceeded to let smart:EQ 3 loose on a full mix, inserting an instance in each of 19 channels of an indie folk/rock track to put its cross-channel processing to work. smart:EQ 3 lets you create groups of up to 6 instances that will then communicate with each other during playback, so that not only is each channel in spectral balance with itself, but problematic frequency conflicts within the group can be resolved automatically.
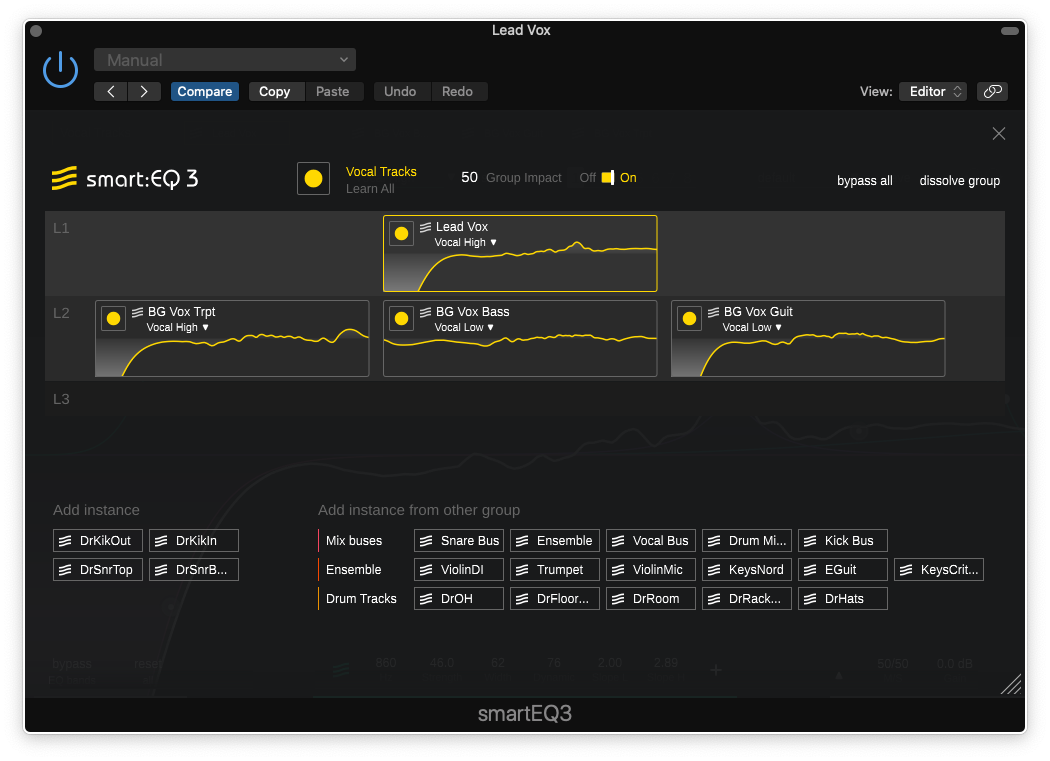
So, for example, you might put all the drums in one group, all the vocalists in another, and so on. To maintain an appropriate sonic hierarchy, the six instances in each group can be structured in up to three layers, with the top layer being given the highest priority – so when grouping vocals, your lead would sit in layer 1 while your backup singers get relegated to layer 2. The Group Impact control lets you adjust the impact of the layer hierarchy on a scale from 0 to 150, or bypass it altogether.
The same principle can be applied to buses, which you can use to address instrument groups with more than six channels through a cascading signal path. You can then apply the same spectral balancing approach to your submixes. It requires a small amount of spatial thinking to organize, but the process is quite intuitive. And smart:EQ 3 has a number of features to help you stay on top of things. I particularly appreciated the colour-keyed Analyzer window that lets you see how tracks within a group are interacting in real time.
The end result
While no single instance of smart:EQ 3 had a staggering effect on my mix, the overall effect was quite impressive. Having each individual channel processed but not grouped for cross-referencing improved the overall clarity, but introducing groups produced a marked improvement, particularly on the acoustic drum tracks. Within the vocal group, the layers allowed me to keep the lead vocals on top of the mix with very little effort compared to my own manual process. Of all the controls that smart:EQ 3 offers, I found the re-arranging of parts within layers gave me the most dramatic results, ultimately reducing the amount of compensation I needed to do with faders later on.
As a final test, I created a mix with the Dynamic control engaged on all my smart:EQ 3 instances (not to be confused with dynamic EQ, where a fixed curve is applied dynamically in response to amplitude). Dynamic adaption in the smart:EQ 3 world means that the curve itself is modified in real time based on the input signal. The result was yet another subtle improvement in separation – in A/B comparisons on this particular mix I noticed it most between lead (female) vocals and cymbals. I was also impressed with how efficiently smart:EQ 3 was working at this point, with about two dozen instances active my 6-core pre-M1 Mac Mini was averaging just below the 25% mark.
Conclusions
New as I am to the concept of mixing for spectral balance, smart:EQ 3 surprised me in a number of ways. It didn’t solve all my problems, but it did solve issues that in some cases would have taken me hours to track down, and which in other cases I may have had trouble identifying at all. And it accomplished this without wresting creative control from my hands, merely clearing a path for me to put my own stamp on things.
Working with smart:EQ 3 isn’t a passive exercise. Your input is required to set up groups and prioritize tracks, at the very least. You’ll inevitably be listening for what decisions smart:EQ 3 has made that differ from your own expectations. And while it’s a fully automatable 24-band EQ on its own, smart:EQ 3 doesn’t set out to replace the tone of your favourite vintage EQ emulations. Just be sure to place them before smart:EQ 3 in your processing chain.
There are always sacrifices to be made during the mixing process, and not everything you love about every track you’ve recorded will live to see the light of day. One producer I admired in the 90s described his approach to EQ as identifying the most important character in each track and cutting everything else. With smart:EQ 3 doing some of the heavy lifting for us, maybe drastic measures like that will become a thing of the past, and we’ll get to keep a little more of what we love in the mix.
Author
Steve Castellano
Steve Castellano is a musician and writer living in Toronto, Canada. He holds a music degree from York University, where his focus was electronic music and composition. He currently records and performs modular electronic music under the name Elettronica Sperimentale.